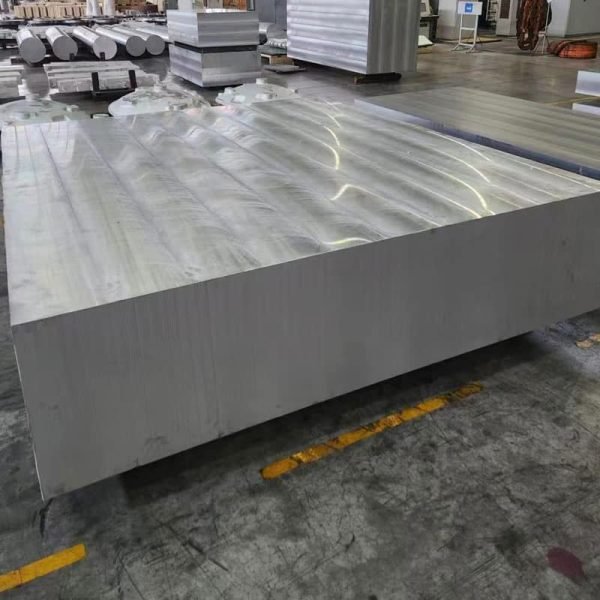
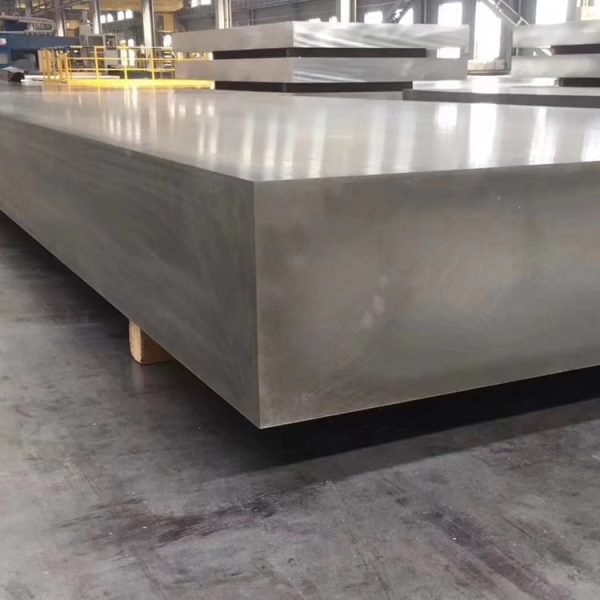
1. Material Composition & Manufacturing Process
5083 aluminum alloy (ASTM B209, EN AW-5083) is a high-strength, non-heat-treatable Al-Mg alloy renowned for exceptional weldability and superior corrosion resistance in marine environments. The ultra-thick forged plate variant offers enhanced mechanical properties through controlled deformation processing:
- Primary Alloying Elements:
- Magnesium (Mg): 4.0-4.9% (primary solid-solution strengthener)
- Manganese (Mn): 0.40-1.0% (grain structure refinement)
- Chromium (Cr): 0.05-0.25% (corrosion resistance enhancement)
- Titanium (Ti): 0.05-0.15% (grain refinement)
- Base Material:
- Aluminum (Al): ≥92.4% (balance)
- Controlled Impurities:
- Iron (Fe): ≤0.40% max
- Silicon (Si): ≤0.40% max
- Copper (Cu): ≤0.10% max
- Zinc (Zn): ≤0.25% max
Specialized Ultra-Thick Forging Process:
- Premium Ingot Production:
- Direct Chill (DC) semi-continuous casting
- Grain refinement with Ti-B additions
- Melt degassing to <0.1ml H₂/100g Al
- Filtration through ceramic foam filters
- Homogenization Treatment:
- 500-520°C for 24-36 hours
- Computer-controlled cooling rate
- Microstructural equilibration
- Surface Preparation:
- Scalping of segregation layer (minimum 10mm)
- Surface inspection for defects
- Preheating for Forging:
- Staged heating to 380-430°C
- Temperature uniformity ±5°C
- Multi-Directional Open-Die Forging:
- Initial forging temperature: 400-425°C
- Final forging temperature: 340-380°C
- Deformation ratio: 3:1 to 5:1
- Multi-directional working to optimize properties
- Specialized dies for ultra-thick sections
- Controlled Cooling:
- Programmed cooling rate to minimize residual stress
- Air-cooling with thermal blankets for thick sections
- Stress Relief Treatment:
- 240-300°C for 1 hour per 25mm thickness
- Furnace cooling to below 200°C
- Final Processing:
- Precision machining to customer specifications
- Surface inspection and cleaning
- Protective packaging for shipment
All manufacturing processes are performed under ISO 9001 quality management system with complete traceability.
2. Mechanical Properties of Ultra-Thick 5083 Forged Plate
| Property | Minimum | Typical | Test Standard | Ultra-Thick Advantage |
| Ultimate Tensile Strength | 290 MPa | 305-330 MPa | ASTM B557 | Uniform properties throughout section |
| Yield Strength (0.2%) | 145 MPa | 160-185 MPa | ASTM B557 | Enhanced through-thickness strength |
| Elongation (50mm gauge) | 12% | 16-22% | ASTM B557 | Superior ductility across full section |
| Hardness (Brinell) | 85 HB | 90-100 HB | ASTM E10 | Consistent hardness profile |
| Shear Strength | 175 MPa | 185-200 MPa | ASTM B769 | Enhanced joint reliability |
| Fatigue Strength (10⁸) | 120 MPa | 125-140 MPa | ASTM E466 | Improved cyclic loading performance |
| Compressive Yield | 145 MPa | 160-190 MPa | ASTM E9 | Critical for load-bearing applications |
| Bearing Strength (e/D=2.0) | 385 MPa | 400-430 MPa | ASTM E238 | Superior fastener performance |
| Impact Energy (Charpy) | 35 J | 40-50 J | ASTM E23 | Enhanced toughness at low temperatures |
Through-Thickness Performance:
- Property variation <5% between surface and core (up to 200mm thickness)
- Directionality ratio (L:LT:ST): 1.00:0.95:0.90 for tensile strength
- Core temperature maintained within critical processing window
- Hardness variation <8 HB from surface to center
3. Microstructural Control for Ultra-Thick Sections
Critical Forging Parameters:
- Strain Distribution Control:
- Minimum total true strain: 1.1-1.3
- Strain rate: 0.01-0.1 s⁻¹
- Multi-directional working (minimum 25% in secondary direction)
- Intermittent reheating for sections >150mm
- Temperature Management:
- Maximum temperature gradient: 30°C across section
- Computer-controlled thermal profile monitoring
- Extended dwell times for temperature homogenization
- Specialized handling equipment for minimal heat loss
Microstructural Characteristics:
- Grain Size: ASTM 5-7 (30-60μm)
- Grain Morphology: Partially recrystallized structure
- Al₆Mn dispersoid distribution: 0.1-0.5μm diameter
- Mg₂Si precipitate control: <0.5 volume percent
- Al-Fe-Mn intermetallic phases: Controlled morphology
- Recrystallized Volume Fraction: 40-60%
- Texture: Mixed deformation/recrystallization texture
- Grain Aspect Ratio: 1.5:1 maximum in final product
Special Features:
- Subgrain structure with high misorientation angles
- Limited recovery due to Mg solute drag effect
- Al₃Mg₂ precipitation controlled to prevent sensitization
- Enhanced dislocation density: 5-8×10¹⁰/cm²
4. Dimensional Specifications & Tolerances
| Parameter | Standard Range | Precision Tolerance | Commercial Tolerance |
| Thickness | 150-400 mm | ±3 mm | ±5 mm |
| Width | 1000-3000 mm | ±5 mm | ±8 mm |
| Length | 2000-8000 mm | ±7 mm | ±12 mm |
| Flatness | N/A | 0.2% of length | 0.4% of length |
| Parallelism | N/A | 0.6% of thickness | 1.0% of thickness |
| Edge Straightness | N/A | 2 mm/m | 4 mm/m |
| Surface Roughness | N/A | 6.4 μm Ra max | 12.5 μm Ra max |
Ultra-Thick Specific Parameters:
- Density: 2.66 g/cm³ (±0.01)
- Weight Calculation: Thickness(mm) × Width(m) × Length(m) × 2.66 = Weight(kg)
- Maximum Single Plate Weight: 20,000 kg
- Machining Allowance: Recommend 15mm per side minimum for critical dimensions
- Stress Relief: Required before precision machining for plates >200mm
- Plate Flatness: Measured under self-weight on flat surface
- Ultrasonic Testing: 100% volumetric inspection available
5. Corrosion Resistance Performance
| Environment | Performance | Corrosion Rate | Expected Service Life |
| Marine Atmosphere | Excellent | <0.02 mm/year | 30+ years |
| Immersed Seawater | Very Good | <0.10 mm/year | 25+ years |
| Industrial Exposure | Excellent | <0.05 mm/year | 25+ years |
| Fresh Water | Excellent | Negligible | 40+ years |
| Stress Corrosion | Excellent | Highly resistant | Design life |
| Exfoliation | Excellent | EXCO rating EA | Design life |
| Galvanic Coupling | Fair | Isolation required | Application dependent |
Corrosion Protection Options:
- Anodizing:
- Type II (Sulfuric acid): 10-25μm thickness
- Type III (Hard anodize): 25-75μm thickness
- Marine-grade sealing treatments
- Conversion Coatings:
- Chromate conversion per MIL-DTL-5541
- Chrome-free alternatives for environmental compliance
- Titanium/Zirconium-based treatments
- Protective Systems:
- Epoxy primer + polyurethane topcoat
- Marine-grade multi-layer systems
- Sacrificial zinc-rich primers
- High-build epoxy coatings for immersion service
Environmental Performance Factors:
- Sensitization Resistance: Superior to 5086 alloy
- NAMLT Test Performance: <15mg/cm²
- IGC Resistance: Excellent after stabilization treatment
- H₂ Embrittlement: Minimal susceptibility
6. Machining & Fabrication Characteristics
| Operation | Tool Material | Recommended Parameters | Notes for Ultra-Thick Sections |
| Heavy Milling | Carbide | Vc=300-600 m/min, fz=0.15-0.30 mm | Climb milling recommended |
| Deep Hole Drilling | Carbide drills | Vc=60-100 m/min, fn=0.15-0.25 mm/rev | Step drilling for deep holes |
| Face Milling | PCD cutters | Vc=500-1000 m/min | High positive rake angles |
| Turning | Carbide/PCD | Vc=200-500 m/min | Rigid setup essential |
| Tapping | HSS-E taps | Vc=10-20 m/min | 50% thread recommended |
| Sawing | Carbide-tipped | 40-60 m/min | Flood coolant mandatory |
Fabrication Considerations:
- Forming Limits: Minimum bend radius 2.5× material thickness
- Cold Working: Limited to 15-20% before annealing
- Hot Working: 260-370°C optimal temperature range
- Weldability: Excellent with 5183, 5356, or 5556 filler
- Welding Methods: GMAW, GTAW, FCAW suitable
- Post-weld Treatment: Brush/needle scaling recommended
- Stress Relief After Welding: 200°C for 1 hour per 25mm
- Cutting Methods: Plasma, waterjet, or sawing preferred
7. Welding Performance & Recommendations
| Welding Process | Filler Material | Parameters | Special Considerations |
| GMAW (MIG) | ER5183, ER5556 | DCEP, 22-26V, 140-250A | Pulse spray transfer recommended |
| GTAW (TIG) | ER5183, ER5356 | AC, 12-15V, 120-200A | Thoriated tungsten electrodes |
| FCAW | E5183T, E5556T | DCEP, 24-28V, 150-260A | Minimal interpass cleaning |
| SAW | ER5183, ER5356 | 26-30V, 350-550A | Neutral or slightly basic flux |
Welding Best Practices for Ultra-Thick Sections:
- Joint Preparation:
- X-groove or double-V for thickness >25mm
- Root gap 2-4mm
- Root face 1-3mm
- Bevel angle 50-60°
- Thorough degreasing with acetone or MEK
- Preheating:
- Generally not required
- For sections >200mm, preheat 50-80°C to reduce thermal gradient
- Interpass Temperature:
- Maximum 120°C
- Monitor with infrared thermometer
- Post-weld Treatment:
- Stress relief recommended for thick sections
- Thorough cleaning of flux and spatter
- Inspection Methods:
- Visual inspection per AWS D1.2
- Radiographic or ultrasonic testing for critical joints
- Dye penetrant for surface defects
8. Physical Properties for Engineering Design
| Property | Value | Design Implications |
| Density | 2.66 g/cm³ | Weight calculations and buoyancy |
| Melting Range | 574-638°C | Welding and heat treatment parameters |
| Thermal Conductivity | 117 W/m·K | Heat dissipation in thermal applications |
| Electrical Conductivity | 29% IACS | Electrical applications and design |
| Specific Heat Capacity | 900 J/kg·K | Thermal inertia calculations |
| Thermal Expansion | 23.8 ×10⁻⁶/K | Expansion joint design and thermal stress |
| Young's Modulus | 71 GPa | Structural stiffness and deflection |
| Poisson's Ratio | 0.33 | Strain relationships in complex loading |
| Damping Capacity | Moderate (0.01-0.02) | Vibration control applications |
Environmental Performance:
- Operating Temperature Range: -196°C to +200°C
- Cryogenic Performance: Excellent toughness retention
- Fire Resistance: Non-combustible
- Magnetic Properties: Non-magnetic
- Radiation Resistance: Excellent
- Recyclability: 100% recyclable with no quality loss
- Environmental Impact: Lower energy footprint than steel
9. Quality Assurance & Testing Protocol
Standard Inspection Regime:
- Chemical Composition Testing:
- Optical emission spectroscopy
- Verification of all alloying elements
- Mechanical Testing:
- Tensile testing (longitudinal and transverse directions)
- Hardness mapping (surface and cross-section)
- Impact testing for critical applications
- Non-Destructive Testing:
- Ultrasonic inspection per ASTM A578/A578M
- Dye penetrant inspection for surface defects
- Dimensional Inspection:
- CMM verification of critical dimensions
- Thickness mapping at specified grid points
- Flatness measurement under self-weight
- Microstructural Analysis:
- Grain size determination
- Inclusion rating per ASTM E45
- Sensitization testing for H tempers
- Metallographic examination
Certification Options:
- Mill Test Report (EN 10204 3.1)
- Third-party inspection certification (EN 10204 3.2)
- DNV-GL certification for marine applications
- ABS certification for marine structures
- Lloyd's Register certification
- Customer-specific certification requirements
- Material traceability documentation
- Production record documentation
10. Industrial Applications & Use Cases
Primary Applications:
- Naval and commercial shipbuilding
- Offshore oil & gas platforms
- Pressure vessel components
- Cryogenic storage and transport
- Heavy transportation structures
- Bridge decking and structural components
- Defense industry applications
- Chemical processing equipment
- Mining equipment structures
- Marine propulsion system components
Specific Use Cases:
- LNG Carrier Structural Components:
- Superior low-temperature toughness
- Excellent weldability for complex structures
- Good strength-to-weight ratio


